


Hello Connectors!
We are incredibly excited that Mercell Sourcing Core is available to our customers. To help you navigate your new experience we’ve jotted down a few things that are good to know about Sourcing Core.
In this article we’ll be taking a look at Tender Management from the Buy side perspective, specifically how to prepare a tender, publicise it, how to react to questions from suppliers, how to award a supplier, and the Messages module.
To watch a video on these topics, please use the links below:
Let’s dive right in:
Preparation
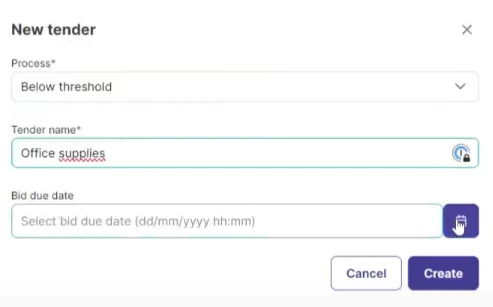
After logging into Sourcing Core you’ll be presented with a list of all your currently active tenders. The “New Tender” button in the top right corner will let you create a new tender. From the window that pops up you can give your tender a name, a due date, and select which process it falls under.
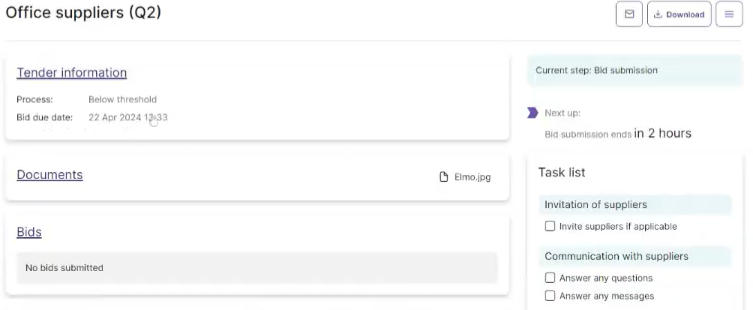
Once it’s been created you’ll end up in the tender’s Office Supplies screen. From here you have access to different blocks of information. You’ll also see a menu on the right hand side listing the next step in publishing your tender, as well as a task list for you to fill out your tender.

Clicking Tender Information will take you to a screen where you give your tender a description. You can write your description yourself, or use an already prepared template to fill everything in for you. Clicking the “Preview” button will let you see what your published tender will look like. “Allowed number of bids” sets the number of bids a supplier can submit. It’s automatically set to 1, but you can change it how you see fit.
Documents is where you can upload any relevant documents pertaining to your tender.
Finally, under Supplier Invites, you can add suppliers to a shortlist who will receive an invitation to your tender once it’s been made public. Suppliers can be invited via email or by searching for their name, contact person, or registration number.
Once you’ve finished the above items you are ready to publish your tender!
Publication
Clicking the “Publish tender” button will publish your tender after you’ve confirmed everything has been set up correctly. When it’s published you’ll see that the current step in the right-side menu has been updated to say “Bid submission”. You’ll also be able to see when bid submission ends.
Any received bids will be listed by clicking on the link named Bids. You’ll be able to find your shortlisted supplier by clicking on Suppliers.
Questions & Announcements
The Questions and Announcements module allows bidders to submit questions to buyers about their tenders. Buyers can also use this module to publish announcements to the tender, as well as pose questions on behalf of suppliers.
New questions will be available to you in the module and can be sorted by name, date, ID, and other options.
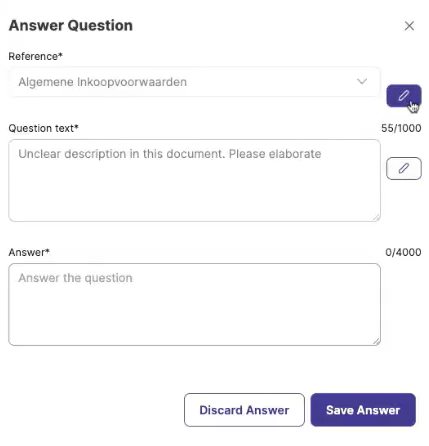
Clicking on the pencil icon next to a question will bring up a new window where you can type out your answer to a bidder’s question. You’ll also be able to see the question text, in case you need to reference it.
Once you’re satisfied with the answer you’ve typed out and submitted it, it will be moved to the Ready tab. From here you’ll see all the answers you’ve provided. Please note that answers in the Ready tab are not public yet. They’re just ready for publishing.
The “...” menu on the right hand side of each answer will allow you to delete, edit, or publish your answer to a bidder. This extra step is to ensure that you’re 100% happy with the answer you want to provide to a bidder.
When an answer is published it will show up in the Published tab. From here you can Unpublish an answer, which will move it back to the Ready tab.
Opening the Vault and Awarding Tenders
Once the bid submission period has ended, suppliers can no longer submit bids on your tender. You also can’t answer supplier questions or publish announcements to your tender.
- Awarding Tenders (English)
To view the bids you need to click the button named “Open Vault”. That will proceed your tender to the next step, which is the Awarding step. Now you’re able to view the bids that have come in, as well as award one of them. Your right-hand menu should have updated again, with a new tasklist.
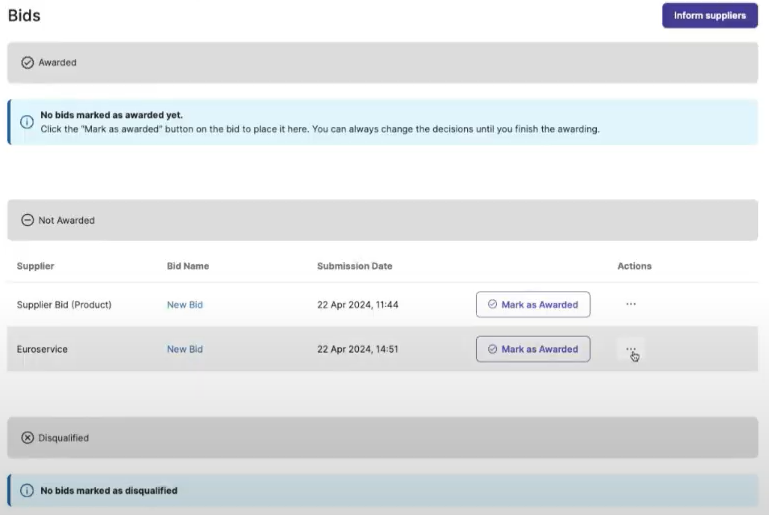
Going to Bids will list all the bids that have been submitted. From here you can view the content of the bids and download any submitted documents. Whichever bid you decide to accept can be marked as awarded by clicking the corresponding button. You can also disqualify any bids by clicking on the “...” menu to the right of a bid.
The “Inform Suppliers” button will let you send a message to all suppliers and let them know then award results.
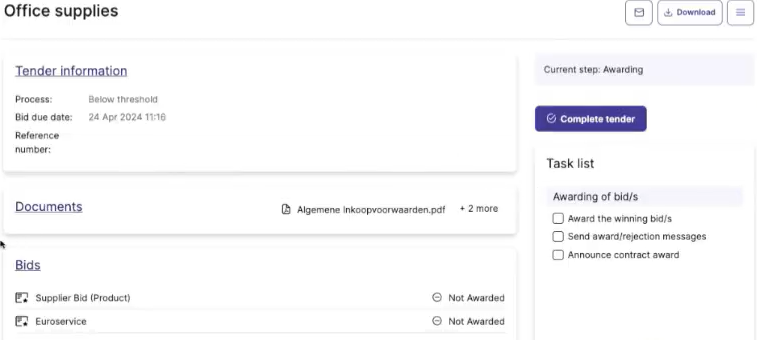
Your final step, after finishing everything you’ve wanted to do, is clicking the button named “Complete Tender”. Your tender will then be marked as completed!
Congratulations, you’ve successfully completed a buy side tender.
Messages
Finally, we want to quickly talk about the Messages module in the tender. Both buyers and suppliers can send messages. Buyers can send messages to one or multiple suppliers, while suppliers can send messages to a single buyer.
The envelope button in the top right corner will take you to the Messages module. Here you’ll find three tabs: Inbox, Sent and Drafts. You can create a new message in the top right corner.
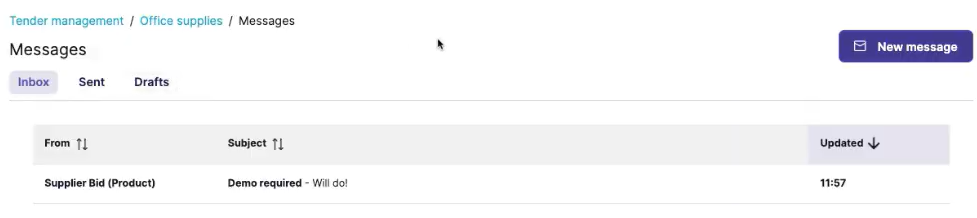
Clicking a message in your inbox will automatically open it, and from here you can answer the message how you want. You can even upload files to send to recipients! You can also save your message as a draft. Send messages will be stored in the Sent tab.